



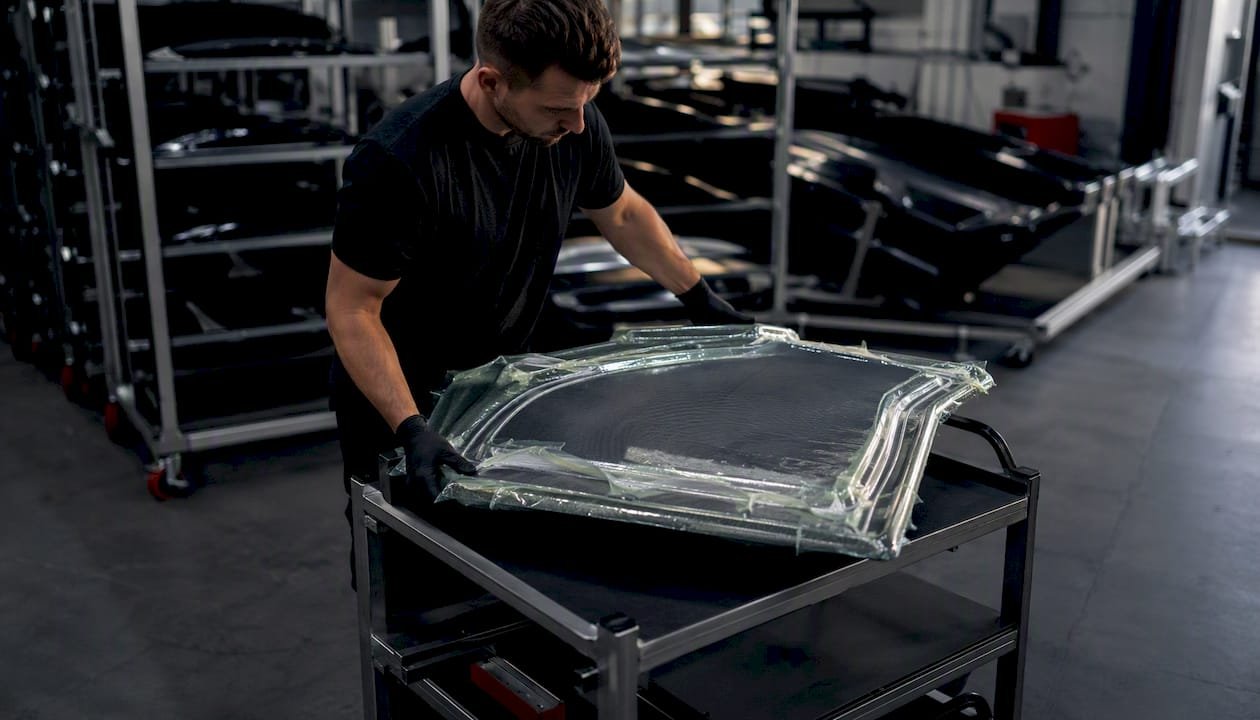
Autoclave curing delivers the lowest void content, highest fiber volume fraction, and best cycle-to-cycle repeatability of any thermoset composite process. The trade-offs are real: capital cost is high, part size is constrained by vessel diameter, and cycle times run longer than oven or infusion alternatives. Choose autoclave when the performance stakes justify those costs — aerospace skins, primary structural shells, safety-critical mounts, and high-fatigue aerodynamic surfaces all belong to that category.
Three concrete triggers tell you autoclave is the right call:
- Certification or regulatory requirement. Aerospace, motorsport homologation, and some automotive safety standards specify autoclave-processed laminates by name or by the void and FVF thresholds only autoclave reliably achieves.
- Sub-1% void target. Autoclave molding typically achieves FVF of 55–65% and void content below 1% under good process control — a benchmark vacuum-only and infusion processes rarely match consistently.
- Fatigue-critical or tight-tolerance geometry. When delamination under cyclic load or dimensional drift over service life would be catastrophic, the consolidation pressure autoclave provides is the engineering answer.
Typical operating bands: 120–180°C for most epoxy prepreg systems, external pressures of 3–7 bar, and internal bag vacuum held at 0.9–1.0 bar absolute below ambient throughout the cure. Those numbers orient the rest of this guide.
Key Takeaways
| Point | Details |
|---|---|
| When autoclave is required | Use it for certified, fatigue-critical, or sub-1% void parts; alternatives are acceptable for non-structural panels. |
| Critical parameters | Temperature (120–180°C for most epoxies), pressure (3–7 bar), and dwell time together determine conversion and void content. |
| Pressure vs. vacuum alone | Autoclave pressure raises consolidation force to 4–8 bar total, achieving FVF of 55–65% and voids below 1% that vacuum-only cannot match. |
| Monitoring and validation | DSC witness coupons, thermocouple logs, and C-scan NDT are the minimum validation set for any structural autoclave run. |
| Asmsportstech finished parts | Pre-preg carbon body kits from Asmsportstech carry validated autoclave cure records and OEM+ fitment, eliminating in-house process risk. |
Table of Contents
- How does the autoclave carbon fiber process work, step by step?
- What cure parameters actually control carbon fiber laminate quality?
- Which resins, prepregs, and tooling work with autoclave curing?
- How does autoclave pressure reduce voids and improve mechanical properties?
- What does an autoclave cost, and how do you access one?
- When are out-of-autoclave alternatives acceptable?
- How do you monitor cure and verify quality in the autoclave?
- How do you diagnose and fix common autoclave defects?
- Autoclave preflight checklist you can adapt for your shop
- ASM Sports Tech’s view on when autoclave curing matters for automotive parts
- How to inspect a part before autoclave loading and validate the cure cycle
- Post-cure treatments and their impact on mechanical properties
- A candid perspective on shop readiness and when to outsource
- Why buying finished autoclave-processed carbon parts often makes more sense
- Sources
How does the autoclave carbon fiber process work, step by step?
The autoclave bag-molding process is mature and well-documented, covering debulking, bagging, cure, and debagging as its four load-bearing steps. Each one has failure modes that compound downstream, so sequence discipline matters as much as parameter precision.
Layup and prepreg handling
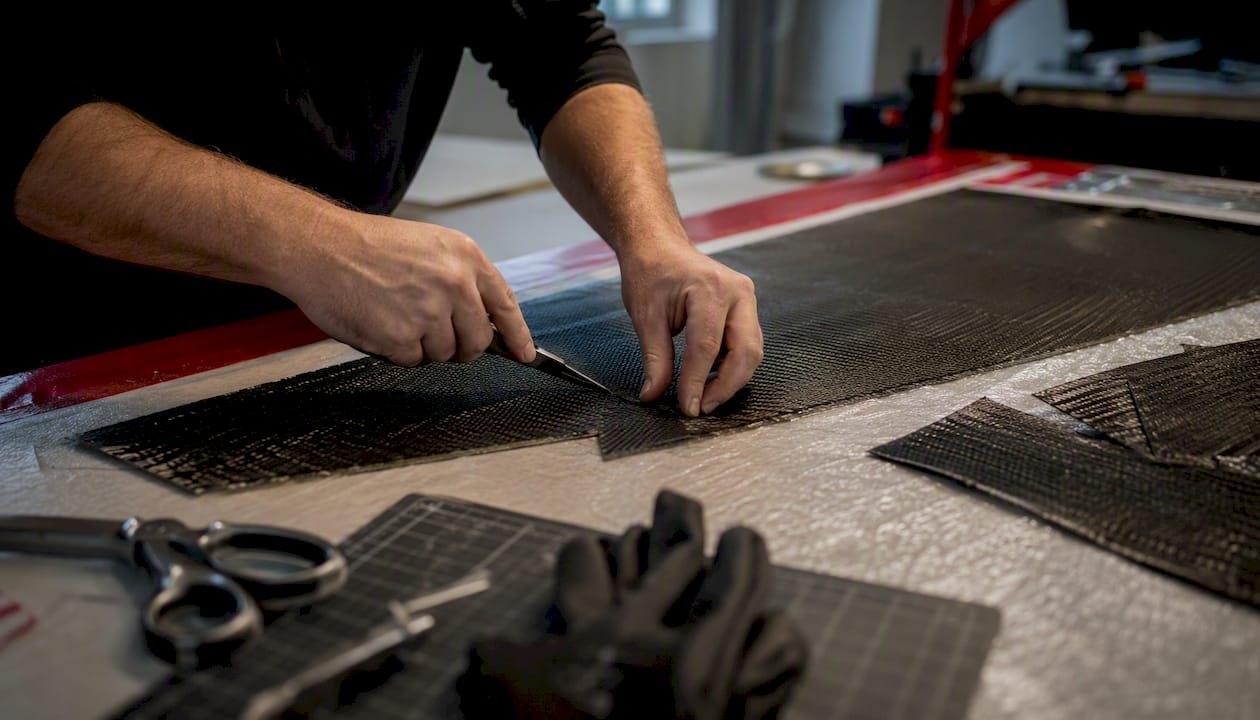
Prepreg must stay cold until it reaches the layup table. Pull material from the freezer, allow it to reach room temperature inside its sealed bag to prevent condensation, then cut and orient plies per the ply book. Tooling release — either a semi-permanent release agent or a PTFE-coated peel ply — goes on first. Ply orientation errors at this stage cannot be corrected after cure; a disciplined ply-by-ply inspection against the ply book is the only safeguard.
Debulking cycles
Debulking compresses each set of plies under vacuum before the next group is added, expelling trapped air and volatiles before they become voids. For typical aerospace prepreg layups, a debulk every 3–5 plies is standard practice. Thicker laminates or woven fabrics with lower air permeability may need more frequent debulks. Skipping debulks to save time is the single most common root cause of void-rich laminates.
Vacuum bagging for autoclave runs
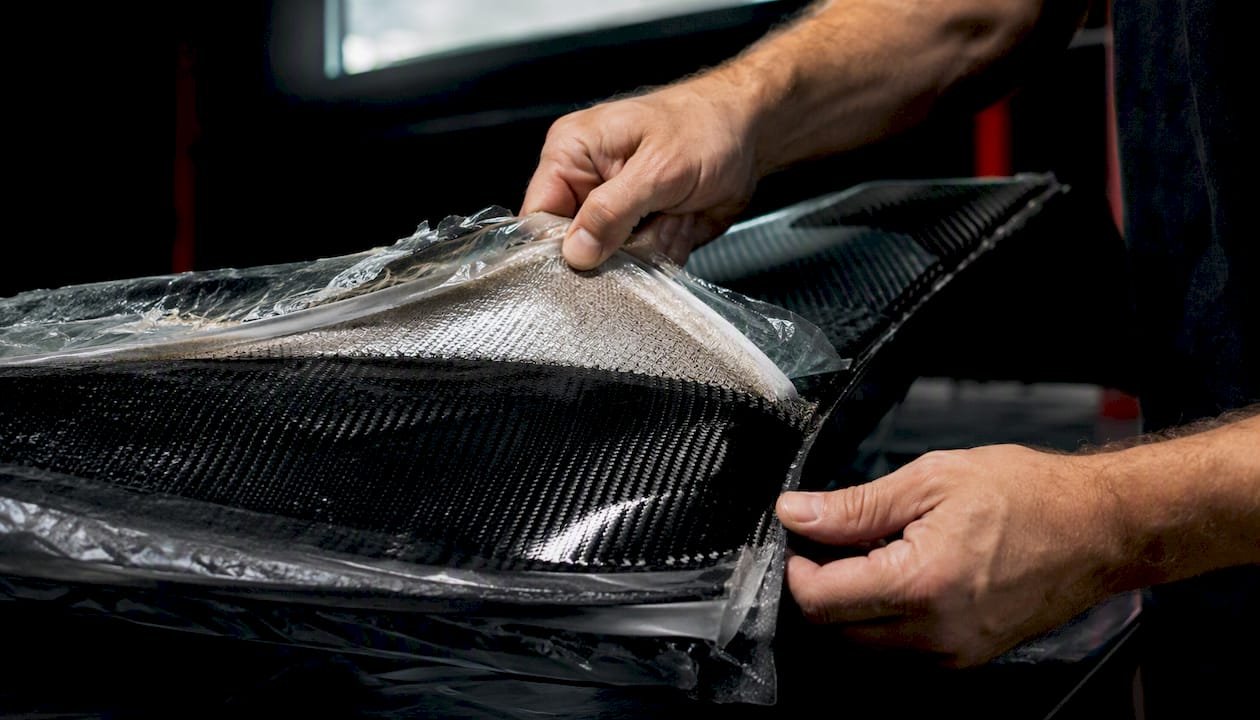
Autoclave bagging differs from oven bagging in one critical respect: the bag must withstand both full vacuum and the external autoclave pressure simultaneously. The stack, from tool surface outward, runs: release film, peel ply, bleeder/breather layer, and then the vacuum bag sealed with tacky tape. For complex geometries, engineered vacuum channels cut into the breather or placed as spiral wrap tubing help distribute vacuum uniformly across deep pockets and tight radii.
Leak check before loading. Apply full vacuum, isolate the pump, and hold for ten minutes. Pressure rise above roughly 5 mbar per minute signals a leak that will compromise consolidation. Fix it before the part enters the vessel.
- Release film: perforated or non-perforated depending on desired resin bleed
- Breather layer: glass mat or polyester felt, sized to cover the full bag footprint
- Vacuum ports: minimum two per part, positioned at opposite ends for redundancy
- Bag material: nylon or polyimide film rated above the peak cure temperature
Pro Tip: For concave or deeply contoured tools, pre-pleat the bag at corners before sealing. A bag pulled tight across a sharp radius will bridge, creating a resin-rich pocket at the corner and a void-prone zone immediately adjacent.
Loading, pressurization, and nitrogen purge
Load the bagged part onto the autoclave platen or mandrel fixture. Connect vacuum lines and verify vacuum is holding before closing the door. Most industrial autoclaves purge with nitrogen before pressurizing to reduce oxygen concentration, which matters for resins sensitive to oxidative degradation at elevated temperature. Industrial autoclaves commonly run at several bar of external pressure with automated controls and traceability for serial production. Pressurize gradually — a sudden pressure spike can shift plies before the resin has begun to gel.
Debagging and post-cure handling
Allow the part to cool to below 60°C before opening the autoclave and removing vacuum lines. Debagging a hot part risks distortion because the resin modulus is still low near Tg. Peel consumables carefully; aggressive pulling can delaminate surface plies. Inspect the tool-side surface immediately for resin-rich zones, print-through, or bridging before the part leaves the tool.
What cure parameters actually control carbon fiber laminate quality?
Temperature, dwell time, autoclave pressure, bag vacuum level, and heating and cooling rates each govern a distinct aspect of resin conversion and void suppression. Getting one wrong while optimizing another is how parts fail qualification.
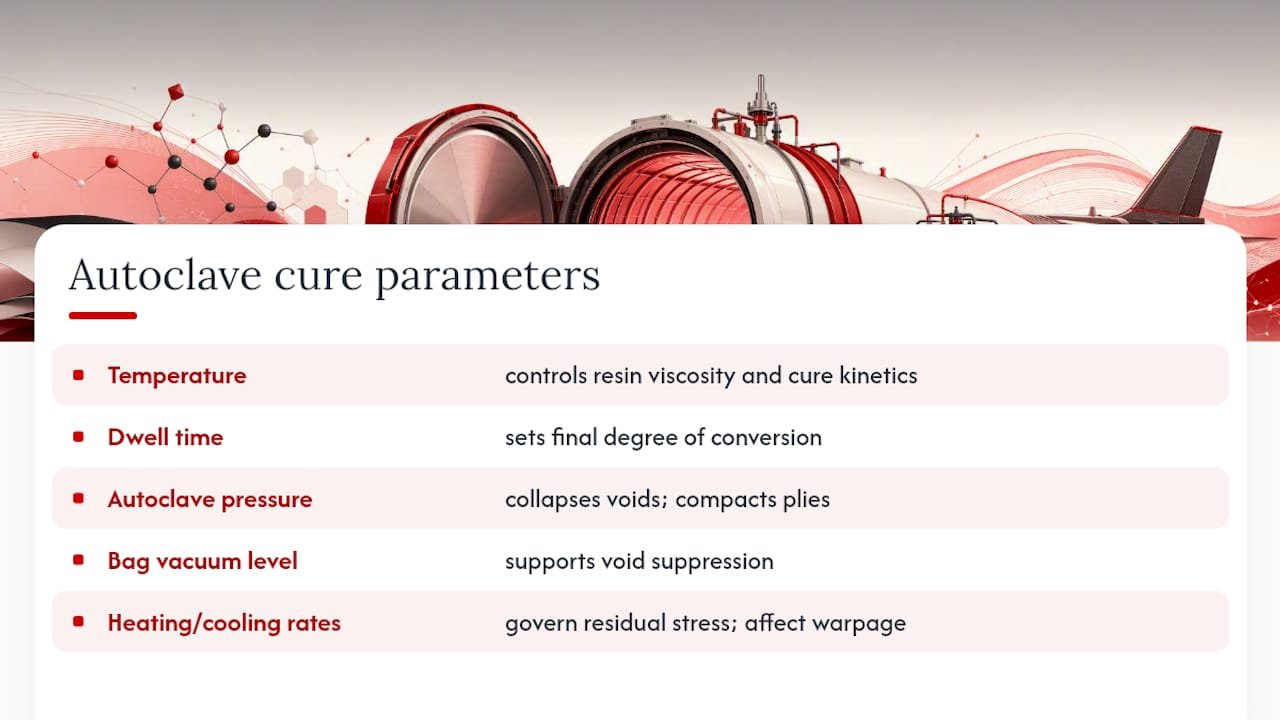
Temperature drives resin viscosity and crosslink kinetics. Too low and conversion stalls; too high and exotherm in thick sections can char the resin before pressure has time to collapse voids. Typical autoclave cure temperatures for thermoset CFRP run 120–180°C for most epoxy systems, with thermoplastic matrices requiring substantially higher values.
Dwell time at peak temperature determines final degree of conversion. DSC kinetic data — measuring the residual heat of reaction against a fully cured reference — confirms whether a given time-temperature combination achieves the target conversion. Cure kinetics measured by DSC show that degree of conversion correlates closely with tensile strength, and certain lower-temperature, longer-time combinations can reach acceptable conversion with reduced energy cost.
Autoclave pressure is the variable that separates autoclave from every other process. External pressure collapses voids, compacts plies, and drives excess resin into the bleeder. A factorial DOE on CFRP found maximum tensile strength and hardness at 140°C, 120 minutes, and 7 bar, while impact toughness peaked at the same temperature and time but at only 3 bar — a reminder that no single parameter set simultaneously maximizes all properties.
Heating and cooling rates govern residual stress. Fast ramps through the gel point lock in thermal gradients; fast cooling from peak temperature builds residual stress that can warp thin skins or initiate microcracking. Rates of 1–3°C per minute are common for structural aerospace prepregs; thick laminates often require slower ramps to prevent exotherm.
Example cure cycles
The manufacturer-recommended cure cycle (MRCC) is the validated baseline for a given prepreg system. Deviating from it — even by shortening the dwell — requires re-validation by DSC or mechanical coupon testing. Two-stage cycles (ramp to a lower hold temperature to allow resin flow and void migration, then ramp to peak for full crosslinking) are standard for thick or complex laminates.
Pro Tip: For thick laminates above 8 mm, place thermocouples at the part centerline, not just the surface. Exotherm peaks at the core and can exceed the surface reading by 15–25°C, pushing the local temperature above Tg before cure is complete.
Warning on Tg limits: Never run a post-cure above the material’s wet Tg if the part will see moisture in service. Overcure at temperatures approaching resin char point (typically above 230°C for standard aerospace epoxies) degrades matrix toughness irreversibly.
Which resins, prepregs, and tooling work with autoclave curing?
Not every material is autoclave-compatible, and not every autoclave-compatible material is the right choice for a given part. Resin class, prepreg architecture, and tooling material all interact.
Resin classes commonly processed in autoclaves:
- Aerospace epoxies (120°C and 180°C systems): The workhorses of structural composites. Well-characterized kinetics, broad supplier base, and extensive MRCC data.
- High-Tg epoxies and toughened epoxies: Used where service temperature or impact resistance requirements exceed standard aerospace grades.
- Phenolics and cyanate esters: Higher processing temperatures (often 180–220°C) and pressures; used for fire-resistant or high-temperature applications. Off-gassing during cure requires careful venting design.
- Bismaleimides (BMI): Bridging epoxy and polyimide performance; common in engine nacelles and hot-zone structures.
Autoclave prepregs vs. out-of-autoclave (OoA) prepregs. Standard autoclave prepregs are formulated with resin systems that require external pressure to suppress voids — they are not designed to self-vent under vacuum alone. OoA or VBO (vacuum-bag-only) prepregs incorporate engineered porosity and are formulated to allow air evacuation through the dry fiber network before gelation. VBO prepregs can approach autoclave quality when permeability and engineered vacuum channels are correctly managed, but they are a distinct product class — do not attempt to oven-cure a standard autoclave prepreg and expect comparable void content.
Tooling requirements. Tooling must survive repeated thermal cycles without dimensional drift. Steel and aluminum tools offer high thermal conductivity and tight CTE control but add mass and cost. Carbon fiber tooling (matched-CTE tools) reduces thermal gradients across the part but requires careful design to avoid tool delamination under autoclave pressure. Avoid foam cores that off-gas or collapse above their rated temperature; Rohacell and similar PMI foams are autoclave-rated, while standard polyurethane foams are not.
Pro Tip: Apply a thin layer of release agent to all tool surfaces, including edges and datum features, before every run. Release agent breakdown is the leading cause of tool-bond failures that damage both the part and the tool surface.
For a deeper look at how pre-preg carbon fiber compares to wet-layup approaches, the distinction in void content and surface finish becomes clear quickly.
How does autoclave pressure reduce voids and improve mechanical properties?
The mechanistic link between consolidation pressure and final laminate quality is direct. Under vacuum alone, the driving force for void collapse is limited to approximately 1 bar. Autoclave external pressure adds 3–7 bar on top of that, raising the total consolidation force to levels that physically compress dissolved gas bubbles below their equilibrium size and drive resin flow to fill inter-ply gaps before gelation locks the microstructure.
Autoclave molding achieves FVF of 55–65% with void content below 1% under good process control, while vacuum-only and infusion processes yield lower FVF and higher void content.
How fabric architecture interacts with pressure:
- Unidirectional (UD) prepregs compact more uniformly under pressure because fiber beds are aligned and resin flow paths are predictable. Void entrapment tends to occur at ply interfaces.
- Woven fabrics have higher inter-yarn porosity and more complex resin flow paths. They benefit from debulking more than UD plies and may require higher pressure or longer dwell to achieve comparable void content.
- Hybrid layups (UD + woven) combine both behaviors; the woven plies often dictate the debulk schedule.
Debulking frequency, cure schedule shape, and pressure application timing all interact. Applying full autoclave pressure too early — before the resin has reached minimum viscosity — can lock in voids rather than collapse them. The standard practice is to apply pressure at or just before the onset of the first temperature ramp, when resin viscosity is still low enough to allow flow.
What does an autoclave cost, and how do you access one?
Autoclave capital cost spans a wide range depending on vessel size, pressure rating, and control sophistication. Bench-top laboratory autoclaves suitable for small coupons and R&D work start in the tens of thousands of dollars. Mid-size industrial vessels for automotive body panels or aerospace substructures run into the hundreds of thousands. Large-format autoclaves for fuselage sections or wind turbine spars can reach several million dollars, with operating costs driven by nitrogen consumption, electrical power for heating, and maintenance of pressure seals and control systems.
Access options beyond ownership:
- Composite service bureaus: The most practical route for low-volume or one-off parts. Bureaus typically offer validated cycles, traceability documentation, and NDT as part of the service. Lead times of 2–6 weeks are common for non-priority slots.
- University composite labs: Many engineering schools operate autoclaves for research and accept external projects. Cost is often lower than commercial bureaus, but scheduling flexibility and production-grade traceability may be limited.
- Tier-1 and Tier-2 aerospace suppliers: Some offer toll processing for qualified customers, particularly for parts that need to run alongside their own production cycles.
Safety essentials — non-negotiable:
- Nitrogen purge before pressurization to displace oxygen (fire and explosion risk at elevated temperature)
- Pressure relief valves rated to the vessel’s maximum allowable working pressure, inspected on a defined schedule
- Thermal runaway protection: independent over-temperature cutoffs separate from the primary controller
- Operator training and written emergency procedures posted at the vessel
- Interlocked door mechanisms that prevent opening under pressure
Pro Tip: Before committing to a service bureau, ask for their cycle traceability package: thermocouple logs, pressure logs, and vacuum logs for your specific run. A bureau that cannot provide part-level traceability is not a bureau you want signing off on structural parts.
High-quality autoclave facilities pair automated control systems with traceability and multiple autoclaves to enable parallel cycles and faster product industrialization — a model worth benchmarking when evaluating service partners.
When are out-of-autoclave alternatives acceptable?
Out-of-autoclave (OoA) processes have advanced considerably. With modern VBO prepregs and engineered vacuum channels, some aerospace-grade performance is achievable — but permeability control and process modeling are prerequisites for success, not afterthoughts.
VBO and oven cure. VBO prepregs cure in a conventional oven under vacuum bag only. The engineered dry fiber network acts as a gas transport path, allowing entrapped air to migrate to the bag edge before gelation. Results depend heavily on bag integrity, vent placement, and the specific prepreg’s permeability specification. For non-flight automotive panels, marine structures, and large-format parts where autoclave vessel size is the limiting constraint, VBO is a credible choice.
RTM and VARTM. Resin transfer molding (RTM) and vacuum-assisted RTM inject liquid resin into a dry fiber preform held in a closed or semi-rigid mold. These processes scale well for high-volume production and large parts. Void content and FVF are typically lower than autoclave but higher than vacuum-only wet layup. Tooling cost for RTM is significant; VARTM reduces tooling cost at the expense of one-sided surface quality.
Decision heuristics:
- Use autoclave when: certification is required, void target is below 1%, or fatigue life is the design driver.
- Use VBO/oven cure when: part size exceeds available autoclave diameter, volume is low, and void targets of 1–3% are acceptable.
- Use RTM/VARTM when: production volume is high, part geometry is complex but repeatable, and one-sided surface finish is acceptable.
- Use wet layup when: cost is the primary driver, structural requirements are modest, and surface finish can be achieved by post-processing.
Autoclave processing carries clear trade-offs in cost and cycle time — it is justified when performance, certification, or fatigue life make lower-cost processes unacceptable. For a broader look at carbon fiber material choices, understanding the process behind each grade helps clarify which specification your part actually needs.
How do you monitor cure and verify quality in the autoclave?
Process monitoring is what separates a validated production cycle from an educated guess. Four tools do the work: thermocouples, DSC, dielectric sensors, and nondestructive testing.
Thermocouple placement. Place thermocouples at the thickest section of the part, at the thinnest section, and at the tool surface near each end of the part. The thickest section controls exotherm risk; the thinnest section controls minimum dwell adequacy. Log all TC channels continuously and verify that every zone reaches the target dwell temperature within the specified tolerance band (typically ±5°C of the MRCC setpoint).
DSC for cycle validation. Differential scanning calorimetry measures residual heat of reaction in a cured coupon. A fully cured sample shows no residual exotherm peak. Run DSC on witness coupons cured alongside the part to confirm conversion before releasing the part for service. DSC kinetic data confirms that degree of conversion correlates closely with tensile strength(https://www.mdpi.com/2073-4360/14/6/1100), making it the most direct validation tool for MRCC compliance.
Dielectric sensors. Embedded or surface-mounted dielectric sensors measure ion viscosity in real time, tracking resin flow, gelation, and vitrification without destructive sampling. Dielectric sensors and in-situ monitoring provide practical interventions to reduce validation cycles(https://doi.org/10.31399/asm.hb.v21.a0007093) by providing a running measure of cure state that pairs well with periodic DSC spot checks. They are particularly valuable for new material qualifications and for thick laminates where TC data alone cannot confirm core conversion.
Nondestructive testing (NDT):
| NDT method | What it detects | When to use |
|---|---|---|
| Ultrasonic C-scan | Voids, delaminations, disbonds | Primary method for structural parts |
| Tap testing | Near-surface delaminations | Quick field check, non-critical parts |
| X-ray / CT | Internal porosity, fiber waviness | Thick sections, complex geometry |
| Visual inspection | Surface defects, resin-rich zones | Every part, first step |
Establish acceptance criteria before the first production run, not after a part fails.
How do you diagnose and fix common autoclave defects?
Defects in autoclave laminates follow recognizable patterns. Knowing the root cause of each pattern cuts diagnostic time and prevents repeat failures.
Common defect modes:
- Voids and porosity: Caused by insufficient pressure, inadequate debulking, bag leaks, or moisture in the prepreg. C-scan shows diffuse high-attenuation zones. Fix: verify bag integrity before every run, increase debulk frequency, check prepreg moisture content.
- Delamination: Caused by contamination at ply interfaces, insufficient consolidation pressure, or thermal shock during cooling. C-scan shows discrete reflectors. Fix: clean tool and ply surfaces, verify pressure application timing, slow the cooling rate.
- Resin-rich zones: Caused by bridging at radii, excess resin bleed, or incorrect breather placement. Visible on tool-side surface and confirmed by cross-section. Fix: pre-pleat bag at corners, use non-perforated release film to limit bleed, adjust breather coverage.
- Fiber waviness and wrinkles: Caused by ply slippage during layup or bag bridging. Visible on surface; confirmed by cross-section or CT. Fix: increase debulk frequency, use tacky prepreg or spray adhesive at ply interfaces for complex geometries.
- Exotherm damage: Caused by too-fast ramp rate in thick laminates. TC logs show core temperature spike above setpoint. Fix: reduce ramp rate, add intermediate dwell at lower temperature to allow heat dissipation.
| Symptom | Likely cause | Immediate action |
|---|---|---|
| Diffuse porosity on C-scan | Bag leak or insufficient debulk | Leak-check protocol, increase debulk frequency |
| Discrete delamination | Interface contamination | Inspect and clean ply surfaces, verify pressure timing |
| Resin-rich corner | Bag bridging | Pre-pleat bag, adjust release film perforation |
| Surface wrinkle | Ply slippage | Add debulk, use tacky ply or spray adhesive |
| Core TC spike | Exotherm in thick section | Reduce ramp rate, add intermediate dwell |
A part with localized porosity below the acceptance threshold may be salvageable with a secondary bond or repair patch per the applicable repair specification. Parts with through-thickness delamination or exotherm damage are typically scrapped; the process record must be reviewed and corrected before the next run.
Autoclave preflight checklist you can adapt for your shop
A written preflight checklist is the single most effective tool for eliminating process variation. The following sequence covers the critical control points from material receipt to autoclave door closure.
- Prepreg storage verification. Confirm freezer temperature log shows continuous storage at or below the material specification (typically -18°C). Record out-time accumulated since last removal.
- Tool preparation. Clean tool surface, apply release agent, verify datum features and mounting points are clear.
- Ply book review. Confirm ply count, orientation sequence, and splice locations against the engineering drawing. Sign off before layup begins.
- Layup and debulk log. Record each debulk: ply count at debulk, vacuum level achieved, hold time, and vacuum integrity result.
- Bagging stack inspection. Verify release film, peel ply, breather, and bag material are correctly positioned and rated for the cure temperature.
- Vacuum port placement. Confirm minimum two ports per part, positioned for redundancy. Connect and verify vacuum draw.
- Leak check. Apply full vacuum, isolate pump, hold ten minutes. Record start and end vacuum levels. Accept only if pressure rise is within specification.
- Thermocouple calibration and placement. Verify TC calibration is current. Confirm TC positions against the cure plan: thickest section, thinnest section, tool reference point.
- Cycle parameter entry. Enter temperature setpoints, ramp rates, dwell times, pressure setpoints, and vacuum setpoints into the autoclave controller. Have a second operator verify entry against the written cure plan.
- Environmental controls. Record layup room temperature and humidity. Verify both are within the prepreg manufacturer’s processing window.
| Checklist item | Acceptance criterion | Record |
|---|---|---|
| Freezer temperature | At or below spec (typically -18°C) | Temperature log |
| Out-time | Within material specification | Out-time log |
| Leak check | Pressure rise within spec | Vacuum log |
| TC calibration | Within ±1°C of reference | Calibration certificate |
| Cycle parameters | Match written cure plan | Controller printout |
Waste handling note. Prepreg offcuts, peel ply, breather, and bag film are typically classified as composite waste and must be disposed of per local hazardous waste regulations. Resin-impregnated materials cannot go to general waste streams in most jurisdictions. Establish a labeled waste container at the layup table and arrange periodic collection with a licensed waste contractor.
ASM Sports Tech’s view on when autoclave curing matters for automotive parts
Not every carbon fiber part on a performance car needs autoclave processing. That distinction matters more than most aftermarket buyers realize, and it shapes every decision we make at Asmsportstech when specifying a component.
Structural shells, high-fatigue aerodynamic skins, and safety-critical mounting brackets justify autoclave-level control. A front splitter that generates meaningful downforce at speed, a roof panel bonded to a roll cage structure, or a diffuser with integrated mounting points — these components carry real load, and the laminate quality behind them has to be traceable and repeatable.
Cosmetic panels with no structural role are a different conversation. A door mirror cap or a non-structural trunk lid trim piece can be produced by VBO or even wet layup without compromising the car’s safety or performance envelope. Specifying autoclave for every carbon part on a road car is engineering theater, not engineering discipline.
Pro Tip: When evaluating a carbon fiber body kit, ask the supplier for the cure process documentation, not just the fiber specification. A “12K 2×2 twill” label tells you the weave; the cure record tells you whether the laminate behind that weave is actually consolidated.
For automotive carbon fiber components where fitment precision and material integrity are both required, the process behind the part is as important as the design of the part itself.
How to inspect a part before autoclave loading and validate the cure cycle
Pre-autoclave inspection catches problems that no amount of pressure and heat will fix. A delaminated ply interface, a contaminated surface, or a misoriented ply locked in by gelation is a scrap part. Inspect before loading.
Pre-autoclave inspection checklist:
- Visual inspection of every ply interface during layup for contamination, dry spots, or foreign object debris
- Ply orientation verification against the ply book using a protractor or digital angle gauge at each layer
- Edge condition check: confirm no ply drop-offs are unsupported or bridging at part edges
- Vacuum integrity confirmation (the leak check described in the preflight checklist)
- TC placement verification against the cure plan
Cure cycle validation methods. The MRCC is the starting point, not the endpoint. Validate a new cycle by running witness coupons alongside the first production part. Test coupons by DSC for residual conversion, by short-beam shear for interlaminar strength, and by C-scan for void content. Only after all three pass the acceptance criteria should the cycle be released for production use. For new material qualifications, a minimum of three replicate cure runs with full coupon testing is standard practice before the cycle is frozen.
Dielectric monitoring during the validation run provides a real-time cure state record that can be compared against the kinetic model for the resin system. Agreement between the dielectric ion viscosity curve and the predicted gelation and vitrification points confirms the cycle is performing as designed.
Post-cure treatments and their impact on mechanical properties
The autoclave cycle brings the laminate to its initial cure state, but it rarely achieves the maximum possible Tg or conversion in a single step. Post-cure is the deliberate application of additional heat — typically in a conventional oven at atmospheric pressure — to drive residual crosslinking and raise Tg toward the material’s theoretical maximum.
Why post-cure matters. A part cured at 120°C on the MRCC may have a Tg of 115–125°C in the as-cured state. A subsequent free-standing post-cure at 180°C for 60–120 minutes can raise Tg by 20–40°C, depending on the resin system. That increase directly expands the part’s service temperature window and improves creep resistance under sustained load.
Mechanical property effects of post-cure:
- Tensile and compressive strength: Modest improvement or no change for fully converted systems; meaningful improvement when the primary cure left residual unreacted groups.
- Interlaminar shear strength (ILSS): Often increases with post-cure as crosslink density rises, reducing matrix ductility but improving stiffness.
- Impact toughness: Can decrease with aggressive post-cure as the matrix becomes more brittle. This is the same multi-objective trade-off the DOE data highlights — optimizing for Tg and stiffness can cost toughness.
- Dimensional stability: Post-cure relieves residual thermal stresses locked in during the autoclave cycle, reducing the risk of warpage in service at elevated temperature.
Practical guidance. Always perform post-cure free-standing (part removed from the tool) to allow stress relief without tool constraint. Support the part on a conforming fixture to prevent sag. Never exceed the material’s maximum post-cure temperature as specified by the prepreg manufacturer; exceeding it does not improve properties and risks matrix degradation. Log the post-cure cycle with the same traceability discipline as the primary autoclave run.
A candid perspective on shop readiness and when to outsource
The gap between understanding autoclave curing and being ready to run it reliably in a production context is wider than most shops anticipate. We have seen this pattern repeatedly: a team invests in a capable vessel, runs a handful of successful development parts, and then discovers that the real cost is not the autoclave itself but everything around it.
Shop readiness requires trained operators who understand not just the controller interface but the failure modes. It requires a QA procedure with written acceptance criteria, calibrated instruments, and a traceability system that can reconstruct every parameter of every run. It requires tooling that survives repeated thermal cycles without dimensional drift, and a material management system that tracks out-time and freezer temperature continuously.
The hidden costs compound: validation runs on new materials or new geometries, scrap from process development, tooling wear and repair, and the engineering time to investigate non-conformances. For low-volume, high-value parts, outsourcing to a qualified service bureau often delivers better economics and better traceability than building in-house capability from scratch.
Pro Tip: Before scaling from prototype to production, run a full process FMEA (failure mode and effects analysis) on your autoclave workflow. The exercise will surface the three or four control points where a single operator error produces a scrap part — and those are exactly the steps that need written procedures, not tribal knowledge.
One recurring scale-up problem: teams that validate a cycle on small flat coupons and then apply it unchanged to complex, thick, or large-format parts. Geometry changes the thermal mass, the resin flow paths, and the void migration behavior. Always run a geometry-representative witness part before committing to production.
Why buying finished autoclave-processed carbon parts often makes more sense
For most performance car owners and tuning shops, the answer to “should I autoclave this myself?” is straightforward: the process infrastructure required to do it correctly costs more than the parts themselves, and the risk of a non-conforming laminate on a structural component is not a risk worth carrying.

Asmsportstech’s pre-preg carbon fiber body kits are processed through validated autoclave cycles, with traceable cure records and QA documentation behind every component. The fitment is engineered to OEM+ tolerances for specific platforms — the Audi RS7 C8, BMW G87 M2, and others — which means no shimming, no gap-filling, and no compromised aerodynamic performance from parts that weren’t designed for the car they’re going on. Scrap risk, tooling investment, and process validation are absorbed on our side, not yours.
For owners who want the performance and aesthetic of autoclave-grade carbon without the process overhead, our carbon fiber body kits are the direct path. For questions about warranty coverage and insurance implications of carbon body components, the ASM insurance and warranty guide covers the specifics. DIY autoclave work is appropriate when you have a validated process, trained operators, and a part geometry that has been through a full cure cycle qualification — not as a first attempt on a structural component.
Sources
The sources below underpin the process guidance, parameter ranges, and alternative process comparisons throughout this article. Consult DSC kinetic data and applicable ASTM or industry standards before applying any cycle to a new material system.
- Vacuum Bag Autoclave Molding Process for Thermoset Composites
- Introduction to Out-of-Autoclave Prepreg Carbon Fibre
- Carbon Fiber Molding Processes Compared: Autoclave, Compression, Vacuum Bagging and Infusion
- The Bucci Composites autoclave process