



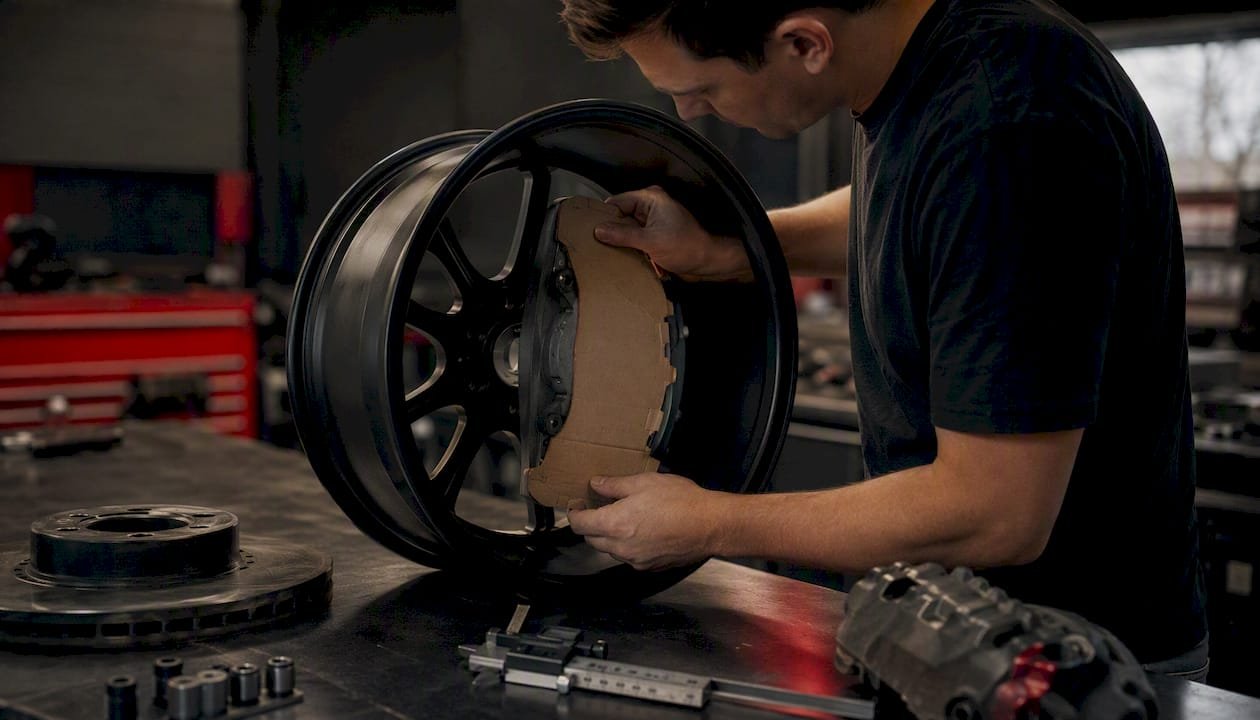
Give a caliper 3 mm to 5 mm of static clearance from the wheel, minimum, per industry guidance from Race Technologies. That number is the floor, not the target. Before you buy a wheel or a big brake kit, do one thing first:
- Print the manufacturer’s 1:1 caliper template, or measure the wheel’s A/B/C dimensions against your hub-to-caliper radius, before the wheel is on the car.
Forum lore still floats around a 2 mm to 3 mm rule from a decade ago. It is outdated for anything you plan to drive hard. Treat the 3 mm to 5 mm window as your working range and build in more room if the car sees track days.
Key Takeaways
Brake caliper clearance requires a 3 mm to 5 mm static minimum verified with a 1:1 template, checked at multiple spoke rotations, and expanded for track use.
| Point | Details |
|---|---|
| Set your minimum | Use 3 mm to 5 mm static clearance as your working range, per industry guidance. |
| Verify template scale | Check the printed ruler against a physical tool before trusting any template dimension. |
| Rotate through spoke positions | Spin the template a full 360 degrees since one spoke can rub while others clear fine. |
| Add heat margin | Build in extra clearance beyond static minimums if the car sees hard or repeated braking. |
| Get platform-specific help | Asmsportstech’s fitment guidance and configurator flag clearance conflicts before you order wheels. |
Table of Contents
- Brake Caliper Clearance Measurement: The Shop Method
- How Much Brake Caliper Clearance Do You Actually Need?
- What Affects Caliper Clearance Beyond Wheel Diameter
- Manufacturer Templates: Downloading, Printing, and Verifying Them
- Fixes When Brake Caliper Clearance Comes Up Short
- Choosing Wheels That Reliably Clear Performance Brakes
- How Brake Heat Changes Clearance Mid Drive
- Safety Tolerances to Hold During Any Clearance Check
- Common Brake Caliper Clearance Measurement Mistakes
- Common Surprises We See in Fitment Shops
- Asmsportstech’s Approach to Brake Clearance and Wheel Fitment
- Frequently Asked Questions
- Sources
Brake Caliper Clearance Measurement: The Shop Method
You don’t need a CAD workstation to check this correctly. You need a tape measure, a digital caliper, a straight edge, a marker, and the wheel off the car.
Here is the sequence a fitment shop actually follows:
- Pull the wheel and set it aside, along with the caliper and rotor already mounted on the spindle.
- Find hub center on the rotor hat and mark it. Every measurement radiates from this point.
- Measure from hub center to the outermost point of the caliper body, usually the mounting ear or the bleeder screw boss. That’s your maximum caliper radius.
- Measure caliper face depth, how far the caliper protrudes outward from the rotor hat toward the wheel’s inner barrel.
- Compare those two numbers against the wheel’s internal geometry, either from a printed template or from the wheel’s own A/B/C spec sheet (inner barrel diameter, spoke pocket depth, and hub bore depth).
To convert a caliper radius into a minimum usable wheel diameter, CPP’s method is the cleanest: double your hub-to-caliper radius, then add your margin, commonly 3 mm on each side, before you go shopping for a wheel size. Skip that math and you’ll spec a wheel that’s technically “big enough” on paper and still kisses the caliper on the car.
Once you have a template, or you’ve cut one from the wheel manufacturer’s CAD drawing, index it to the hub bore and spin it a full rotation inside the wheel, as explained in detail in this CNC machining for UK Motorsport Valley guide. Spokes aren’t uniform. A wheel can clear at one rotational position and touch at another, so check it at several points, not just straight up.
What you’ll need on the bench:
- Digital caliper (for the fine measurements)
- Tape measure and straight edge
- Marker for hub center and reference marks
- Cardboard backing and a utility knife (for cutting and stiffening a printed template)
Pro Tip: Before you trust any printed template, lay a physical ruler across the scale bar printed on the PDF. If your ruler reads 100 mm and the template’s own ruler shows 96 mm, your printer scaled the page down, and every measurement on it is now wrong.
Race Technologies, a Brembo partner, builds this scale check directly into its instructions because printer defaults are the single most common way a correct template produces an incorrect fitment call.
How Much Brake Caliper Clearance Do You Actually Need?
The honest answer depends on how the car gets driven, and treating every build the same way is where people get burned. Street cars with mild pad compounds can often live at the low end of industry guidance. Cars that see track days, autocross, or repeated hard stops need the upper end, plus a personal buffer on top of that.
The consensus splits into three camps:
- Older forum wisdom: 2 mm to 3 mm, a number that circulated widely before big brake kits became common on street cars.
- Current industry guidance: 3 mm to 5 mm as a static minimum, reflected in Race Technologies’ own tutorial.
- Conservative vendor practice: some brake manufacturers, including EBC’s fitment templates, specify a 5.0 mm minimum outright, with no lower band offered.
The gap you measure in the driveway on a cold car is not the gap you have after twenty minutes of hard braking. Hub flex, thermal growth, and runout all eat into that static number once the car is loaded up.
That’s the core distinction: static clearance is what you measure with a ruler in the garage. Dynamic clearance is what’s left once the rotor is glowing, the hub has flexed under load, and the wheel has a few thousandths of runout working against you. A detailed guide on caliper clearance puts it plainly: static minimums assume a best case that track driving rarely delivers.
A workable rule of thumb: 3 mm for a mild street setup with stock or mild pads, 4 mm for spirited street driving, and 5 mm or more if you see a track. Run less than that and the failure mode isn’t cosmetic. It’s contact between spoke and caliper mid corner, which chews through a rotor edge or cracks a wheel finish in one session.
What Affects Caliper Clearance Beyond Wheel Diameter
Two wheels with identical diameter, width, and offset can behave completely differently around the same caliper. Diameter and offset tell you almost nothing about the shape of the wheel’s inner barrel, and that shape is what actually decides whether the caliper fits.
The variables that matter:
- Spoke shape and curvature, particularly where a spoke curves inward near the barrel
- Spoke thickness at its widest cross-section, not its published average
- Spoke offset relative to hub center, since a spoke near the caliper’s widest point behaves differently than one 20 degrees away
- Inner barrel profile depth, how far the barrel steps inward before it reaches the face
- Rotor hat and bell thickness, which pushes the whole caliper assembly outward
- Caliper body geometry, including mounting ears, bleeder bosses, and any raised logo lettering on the face
- Hub-centric ring depth and the length of the wheel hardware itself
Konig Wheels notes that spoke design alone explains why a wheel spec sheet can look identical to a competitor’s and still not clear the same brake kit.
Pro Tip: Rotate your template through a full 360 degrees before you commit to a wheel. A single spoke landing on the caliper’s widest point is enough to turn a “fits fine” measurement into a rub at the worst possible moment.
Manufacturer Templates: Downloading, Printing, and Verifying Them
Most performance brake kit manufacturers, including Brembo’s partners and Baer, publish a 1:1 template on the vehicle or kit-specific product page. The template outlines the caliper body, the rotor hat, and sometimes the disc profile itself, so you can hold it against your actual wheel before spending money.
The process that works:
- Download the vehicle- or kit-specific template PDF and print it at 100% scale, never “fit to page.”
- Confirm the built-in ruler on the printout against a physical tape measure or a known dimension, like your rotor’s own diameter.
- Cut the template out and back it with cardboard so it holds its shape.
- Index it to the hub bore, then secure it with a socket or a spare bolt so it doesn’t shift.
- Spin it inside the wheel through a full rotation, checking clearance at every spoke position.
Hot Rod’s own hands-on check of vendor templates, using a Baer kit as the example, found them accurate once printed and indexed correctly. Some builders reference vendors like Prodigy Werks in fitment forums for similar template checks, though shop practice always comes back to the same verification steps regardless of source.
Pro Tip: If a template looks off, contradicts your physical measurements, or the vendor doesn’t list your exact caliper revision, call the vendor before you cut anything. A wrong template costs you nothing to question and everything to trust blindly.
Fixes When Brake Caliper Clearance Comes Up Short
Interference doesn’t have to end the build. It usually means one variable needs to change, and some fixes are far safer than others.
Ranked from safest to last resort:
- Switch to a wheel model with a deeper inner barrel profile at the same diameter and offset.
- Adjust offset within the wheel manufacturer’s approved range for your hub.
- Add a quality, hub-centric spacer to push the wheel outward slightly, favoring the thinnest spacer that solves the problem over a thicker one.
- Reconsider the caliper or rotor package itself, since some big brake kits offer a smaller radial size with nearly identical stopping power.
Before you reach for a spacer, confirm it’s genuinely hub-centric. A non-hub-centric or excessively thick spacer shifts load onto the wheel bolts alone and can introduce vibration that has nothing to do with balance.
What to check after any fix:
- Bolt length and thread engagement haven’t changed enough to reduce contact
- Fender and tire clearance still holds after the track width shift
- Suspension cycles through full travel, and the wheel clears at full steering lock, both directions
Pro Tip: Cycle the suspension by hand and turn the wheel lock to lock before you ever drive it. A clearance issue that only shows up at full compression or full lock will not show up sitting still in the driveway.
Choosing Wheels That Reliably Clear Performance Brakes
Prioritize wheels that publish their own inner-barrel dimensions or are explicitly marketed for big brake clearance. A spec sheet that only lists diameter, width, and offset is telling you less than half the story.
For a bespoke or forged wheel order, hand the shop your exact caliper dimensions and ask for an indexed mockup before the wheel goes into production. Asmsportstech’s own wheel fitment guidance follows this same principle: platform-specific fitment checks catch problems a generic spec sheet never will, particularly on cars running upgraded brake packages from the factory.
How Brake Heat Changes Clearance Mid Drive
A static measurement taken in a cold garage is the best-case scenario your clearance will ever see. Once the brakes are working, several things happen at once, and none of them add clearance.
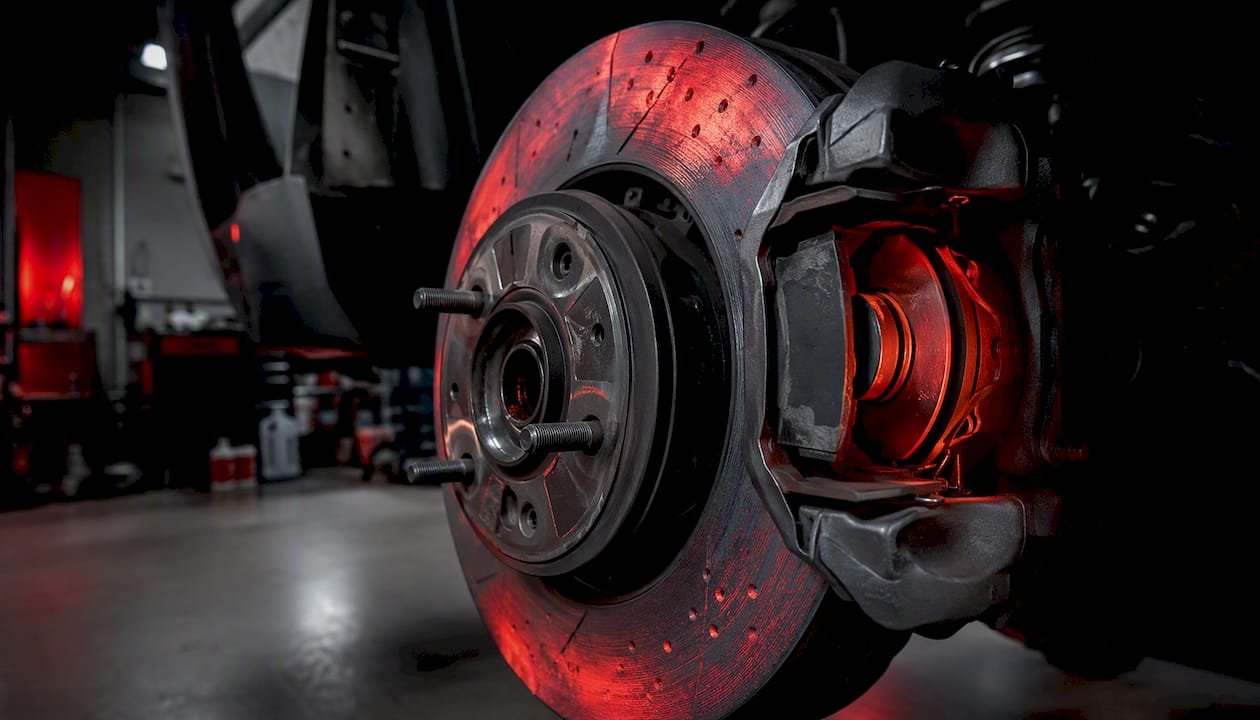
Rotors and calipers both grow with heat. A cast iron rotor can expand measurably across a hard braking cycle, and the caliper body itself experiences thermal growth in its mounting ears and pistons. That growth happens in the exact direction that closes the gap to your wheel’s inner barrel.
Hub flex adds to the problem. Hard cornering combined with heavy braking loads the hub and knuckle assembly, and that assembly deflects by a small but real amount under load, microscopic knock-back that a static check in the driveway will never reveal.
Wheel runout compounds both effects. Every wheel has some runout from manufacturing tolerance, and that runout means the barrel isn’t perfectly concentric to the hub at every point in rotation. Combine thermal growth, hub flex, and runout at the same moment, on the same corner of a track, and a static gap that measured 4 mm cold can shrink to something far tighter under load.
This is precisely why industry guidance treats 3 mm to 5 mm as a starting point, not a finished answer. A street car that never sees repeated hard stops has more margin to work with than a track car lapping in ninety-degree heat.
Safety Tolerances to Hold During Any Clearance Check
Treat every clearance number as a minimum, never a target to design toward. Building a fitment plan around the exact 3 mm floor leaves you with zero margin for manufacturing tolerance, printer error, or a slightly worn wheel bearing.
A few tolerances worth holding firm on:
- Never accept a measurement from a single spoke position. Check the full rotation, since a wheel can clear at one point and touch at another only a few degrees away.
- Never trust a printed template without confirming its scale against a physical tool first. A scaling error of even 5% moves every dimension on the page.
- Never treat a cold, static measurement as your final answer for a car that will see hard use. Add a buffer proportional to how hard the car gets driven.
- Never mix measurement units mid-check. Converting between millimeters and inches by hand mid-measurement is where rounding errors creep in.
If you’re working near the low end of any manufacturer’s stated range, that’s your signal to choose a different wheel, not to proceed and hope runout stays on your side. The tolerance exists because real-world conditions, not showroom conditions, are what the wheel has to survive.
Common Brake Caliper Clearance Measurement Mistakes
Most fitment problems trace back to a handful of repeatable errors, not bad luck. The first is measuring only one spoke position and assuming the rest of the wheel behaves the same way. It rarely does.
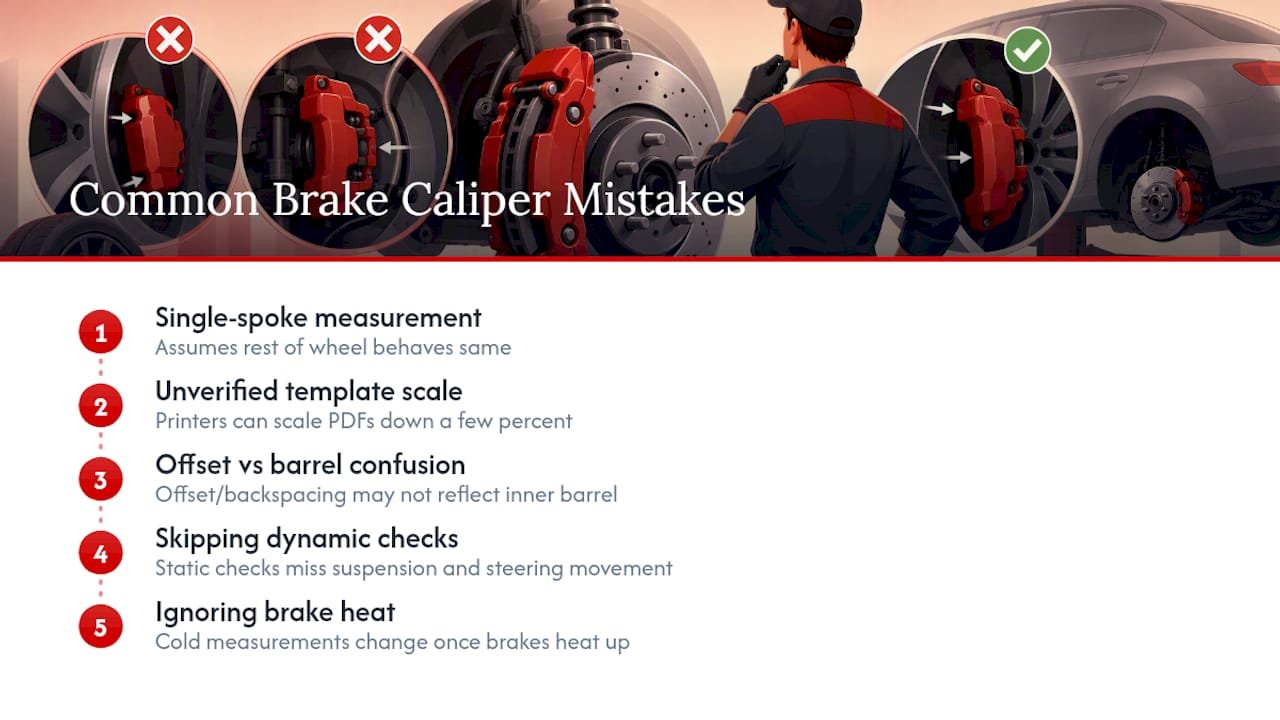
The second is printing a template without verifying scale. Default printer settings routinely scale PDFs down a few percent to fit page margins, and that error is invisible unless you check the ruler printed on the page against a physical tool.
The third is confusing published wheel offset and backspacing numbers with actual inner barrel clearance. Two wheels can share identical offset and still fit differently because of spoke curvature and barrel depth, a point Konig Wheels’ own fitment guidance makes directly.
The fourth is skipping the dynamic check entirely. A wheel that clears sitting still on a lift can still contact the caliper once the suspension compresses or the steering goes to full lock, situations a static bench check never replicates.
The fifth, and most avoidable, is measuring a cold car and assuming that number holds under heat. It doesn’t, and building your margin around a cold measurement alone is how a “clean” fitment turns into a rub three laps into a track day.
Common Surprises We See in Fitment Shops
Hidden hub bolts, unexpected spoke curvature, and three-piece wheel hardware intruding on caliper space catch even experienced builders off guard. Our heuristic: when in doubt, index a template and test with incremental spacers before making any permanent change.
Asmsportstech’s Approach to Brake Clearance and Wheel Fitment
If you’ve just measured your caliper radius and realized your current wheel choice is tighter than you’d like, the fix usually isn’t a compromise part. It’s a wheel spec built with that caliper in mind from the start.
Asmsportstech’s platform-specific approach means we’ve already run these clearance checks on cars like the Audi RS7 C8 and BMW G87 M2, so the forged wheel you’re looking at isn’t a generic spec sheet guess. Our wheel fitment guidance walks through inner barrel and offset considerations specific to big brake packages, and our compatibility configurator flags fitment conflicts before you order rather than after the wheel arrives. If you’re weighing a wheel change to solve a clearance problem, or planning a build around a bigger brake kit from the outset, browse ASM’s custom car parts and get platform-specific advice before you commit to a wheel size.
Frequently Asked Questions
What is the minimum brake caliper clearance for a street car?
Most industry guidance puts the safe static minimum at 3 mm, with 4 mm to 5 mm recommended if the car sees spirited driving or track use.
How do I check caliper clearance without buying new wheels first?
Print the brake manufacturer’s 1:1 caliper template, verify its scale against a physical ruler, then index it inside your existing or prospective wheel and spin it through a full rotation.
Does wheel offset alone tell me if a wheel will clear my calipers?
No. Offset and backspacing are starting points, but spoke curvature, inner barrel depth, and caliper geometry decide actual fitment, which is why a template check matters more than the spec sheet.
Can brake heat cause clearance problems that weren’t there when the car was cold?
Yes. Thermal expansion in the rotor and caliper, combined with hub flex and wheel runout under load, can close a static gap that looked safe in the garage.
What’s the safest fix if my wheel is rubbing the caliper?
Switching to a wheel with a deeper inner barrel profile is safest, followed by adjusting offset within the manufacturer’s approved range, with a quality hub-centric spacer as a last resort.
Sources
- BRAKE TO WHEEL CLEARANCE TUTORIAL (Race Technologies)
- What brakes will fit your wheels? We show you how to check — Hot Rod
- Brake caliper clearance guide — ICOOH