



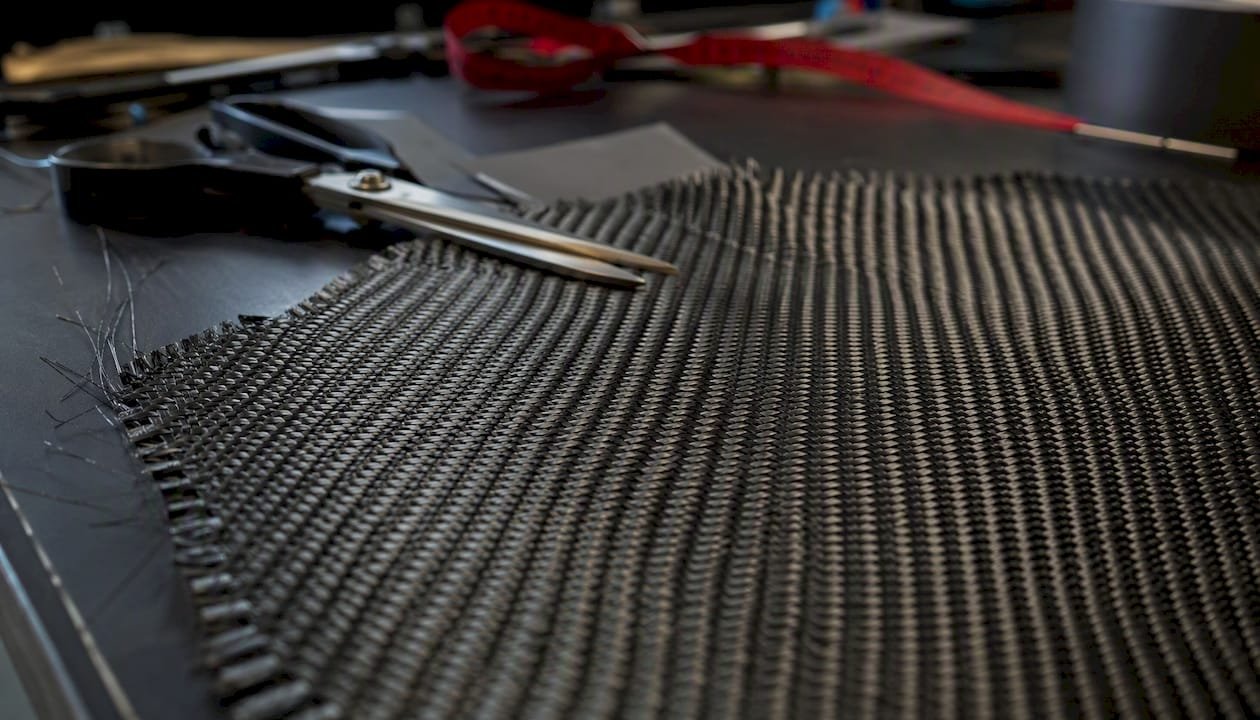
The most relevant carbon fiber weave types are plain (tabby), twill, harness/satin, spread-tow, and unidirectional. Each trades drape, stability, and surface finish differently, and picking the wrong one costs you either performance or finish quality — sometimes both.
Here is the one-line verdict for each family:
- Plain (tabby) weave — highest dimensional stability; best for flat structural panels, simple enclosures, and beginner layups
- 2×2 twill — the default for visible cosmetic skins; balances drape, diagonal pattern, and ease of handling
- 4×4 twill — coarser visual scale, slightly more drape than 2×2; suited to larger panels where the bolder pattern reads well
- 4HS / 8HS satin — superior conformability over compound curves; the choice for complex automotive bodywork and aerospace fairings
- Spread-tow (flat-tow) — ultra-thin, smooth, low-resin; best where thickness control and a refined surface are the priority
- Unidirectional (UD) — highest tensile strength along the fiber axis; used in spar caps, flanges, and load-critical structures
Common tow counts you will encounter on spec sheets include various sizes such as 1K, 3K, 6K, and 12K, indicating thousands of filaments per tow bundle.
Key Takeaways
The single most important principle in carbon fiber weave selection is this: match the weave to the geometry and load path first, then optimize for appearance and cost.
| Point | Details |
|---|---|
| Plain weave for flat panels | Highest stability and easiest handling; best for flat or gently curved structural parts. |
| 2×2 twill 3K at 200–240 gsm | The industry-standard cosmetic skin; balances drape, diagonal aesthetics, and layup ease. |
| 8HS satin for complex curves | Superior conformability over compound geometry; requires vacuum-bagging and careful edge handling. |
| UD for directional strength | Eliminates crimp and delivers maximum tensile stiffness along the fiber axis; pair with woven cross-plies. |
| Always run a proof panel | A 300 × 300 mm test layup reveals bridging, resin pooling, and fraying before a full mold run. |
Table of Contents
- What do weave terms like tow count and areal weight actually mean?
- How does plain weave perform, and where does it belong?
- Why is twill weave the default for visible carbon fiber panels?
- When should you use harness satin weaves like 4HS and 8HS?
- What makes spread-tow fabrics different from standard woven carbon?
- How do unidirectional fabrics work, and when do you need them?
- What specialty weaves exist beyond the standard families?
- Side-by-side comparison of the main carbon fiber weave families
- How do you choose the right weave for your specific project?
- Manufacturing considerations: tow count, prepreg, crimp, and common defects
- Asmsportstech: applying weave selection to automotive body panels
- Notation and glossary: decoding spec sheets and fabric listings
- The practical reality behind carbon fiber weave marketing
- Sources
What do weave terms like tow count and areal weight actually mean?
A woven carbon fabric is formed by interlacing two sets of fiber bundles at right angles. The lengthwise bundles running through the loom are the warp; the bundles crossing perpendicular are the weft. The repeating unit of how they cross defines the weave pattern.
A tow is a single-untwisted bundle of continuous carbon filaments. Tow count, expressed as 1K, 3K, 6K, or 12K, tells you how many thousands of filaments are in that bundle. Smaller tows produce a finer, tighter surface texture and a more refined visual grain. Larger tows cover area faster and cost less per kilogram, making them practical for large structural laminates where appearance is secondary. Retail composite guides consistently recommend small tows (1K, 3K) for cosmetic parts and larger tows (6K, 12K) for cost-effective structural work.
Areal weight is the mass of fabric per unit area, stated in grams per square meter (gsm) or ounces per square yard (oz/yd²). Typical composite fabrics run from roughly 100 gsm for lightweight aerospace plies to 600 gsm for heavy structural reinforcement. A 200 gsm 3K twill is a common starting point for automotive skins.
Crimp is the waviness introduced into a fiber bundle each time it crosses over or under another bundle. More interlacings mean more crimp, which reduces the effective tensile stiffness along that fiber’s axis. Float is the opposite: the length of fiber that runs uninterrupted over multiple crossing bundles. Longer floats mean less crimp, better drape, and a smoother surface — but also a less stable fabric that can shift during handling.
How does plain weave perform, and where does it belong?
Plain weave — also called tabby weave — follows a strict over-one/under-one interlacement. Every warp bundle crosses every weft bundle at the shortest possible interval, producing the highest interlacement density of any weave family. That density is both its strength and its limitation.
Pros:
- Highest dimensional stability; fabric holds its shape on the cutting table and during layup
- Minimal distortion risk when cutting or repositioning
- Predictable resin uptake due to consistent, tight interlacement
- Forgiving for first-time builders working flat or gently curved molds
Cons:
- High crimp at every intersection reduces effective tensile stiffness compared to twill or UD
- Poor drape over compound curves; the fabric resists conforming and tends to bridge
- Surface texture is more pronounced, requiring more fill coat or surface prep for a gloss finish
Typical applications include instrument housings, flat structural panels, simple enclosures, and any part where dimensional accuracy during layup matters more than drape. A 3K plain weave at 200–300 gsm is a standard specification for these uses. Experimental textile studies confirm that plain and twill geometries produce measurable differences in abrasion resistance and crease recovery, meaning the choice between them affects functional behavior well beyond surface appearance.
Why is twill weave the default for visible carbon fiber panels?
Twill weave earns its dominant position in cosmetic carbon fiber work because it threads the needle between stability and drape. The notation tells you the float length: 2×2 twill means each bundle passes over two and under two crossing bundles before stepping one position sideways. That offset creates the signature diagonal rib pattern. A 2×1 twill (over two, under one) is asymmetric and less common; 4×4 twill extends the float to four, producing a bolder, coarser diagonal.
The diagonal pattern is not just aesthetic. Because the offset rows distribute interlacement points across the fabric rather than stacking them in a grid, twill drapes more readily over single-curvature surfaces than plain weave. It conforms to gentle compound curves without the bridging that plagues plain weave on anything but flat molds.
2×2 vs. 4×4 at a glance:
- 2×2 twill — tighter pattern, finer visual scale, better stability, slightly less drape; the industry standard for visible automotive trim
- 4×4 twill — coarser diagonal, more drape, more prone to shifting on cut edges; better suited to larger panels where the bolder visual scale reads proportionally
A 2×2 twill 3K at approximately 200–240 gsm is widely regarded as the most forgiving choice for visible cosmetic work. It handles well, drapes over moderate curves without wrinkling, and produces the classic carbon fiber aesthetic that most buyers recognize. For structural laminates where appearance matters less, heavier twill fabrics in 6K or 12K reduce ply count and cost.
When should you use harness satin weaves like 4HS and 8HS?
Satin weaves are defined by their long floats. A 4HS (4-harness satin) has each bundle floating over three crossing bundles before interlacing once. An 8HS extends that float to seven. The result is a fabric with very few interlacement points per unit area, which translates directly into exceptional drape and a near-smooth surface texture. Eurocarbon’s weaving guide places satin at the top of the drape hierarchy and at the bottom of the stability hierarchy — a tradeoff that defines every handling decision you make with these fabrics.
Pros:
- Superior conformability over tight compound curves and deep draws
- Low crimp produces better fiber alignment and surface smoothness in the cured laminate
- Reduced post-process finishing time on complex shapes
Cons:
- Low dimensional stability; fabric shifts easily during cutting and placement
- Higher fraying risk on cut edges, especially with 8HS
- Requires careful vacuum-bagging and tooling support to prevent distortion during cure
- Generally more expensive than equivalent plain or twill fabrics
Applications where satin weaves justify their handling demands: aerospace fairings, complex automotive body panels (front splitters, hood scoops, mirror caps with tight radii), surfboard skins, and any geometry where a twill would bridge or wrinkle. Impact Materials’ buyer guide recommends vacuum-bagging as standard practice for satin layups, and prepreg versions of 4HS and 8HS significantly reduce distortion risk compared to dry fabric wet layup.
Handling tips: always back satin fabric with a release film or light adhesive spray before cutting; use sharp scissors or a rotary cutter to minimize fraying; apply vacuum pressure progressively rather than all at once to let the fabric conform gradually.
What makes spread-tow fabrics different from standard woven carbon?
Standard carbon tows are roughly round in cross-section. Spread-tow (flat-tow) fabrics mechanically flatten those bundles into wide, thin ribbons before weaving or laying them as non-crimp layers. The result is a fabric with a dramatically lower profile per ply, less resin required to wet out the fibers, and a surface that reads almost like a solid sheet rather than a visible weave.
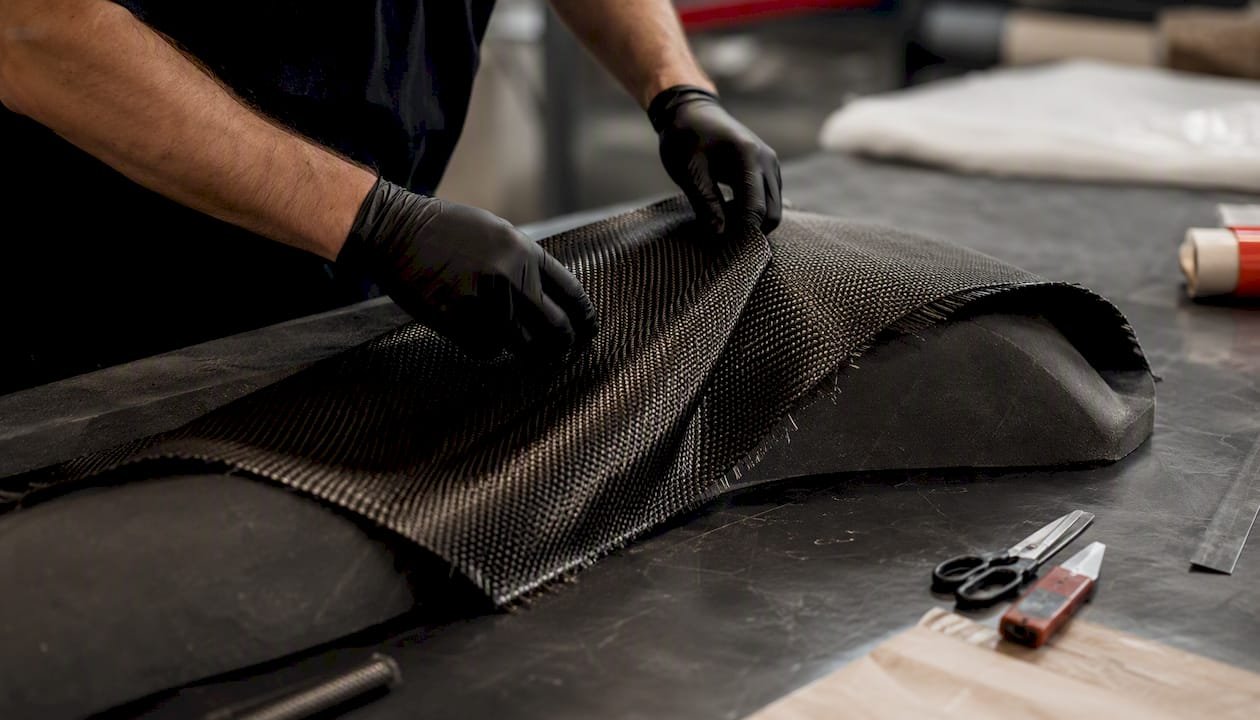
The structural benefit is stiffness-per-thickness. Because the fibers lie flatter, they carry load more efficiently through the laminate thickness, and the reduced resin fraction means a higher fiber volume fraction in the cured part. Spread-tow fabrics are particularly valued where thickness control is critical — aerodynamic surfaces, high-finish exterior panels, and lightweight laminates where every gram and every tenth of a millimeter matters.
The tradeoff is handling. Flat-tow fabrics are more sensitive to distortion during cutting and placement. They require precise cutting tools (a sharp rotary cutter or CNC cutting table) and careful handling to avoid disturbing the tow alignment. Prepreg versions are significantly easier to manage than dry spread-tow fabrics.
A related category is plated or cosmetic-face fabrics, where a fine-weave or spread-tow layer is bonded to the visible face of a heavier structural fabric. The structural core carries the load; the cosmetic face delivers the finish. This approach is common in premium automotive trim where both appearance and weight targets are non-negotiable.
How do unidirectional fabrics work, and when do you need them?
Unidirectional (UD) carbon fabric is not woven in the classical sense. Nearly all fibers run parallel in a single direction, held together by a light stitched carrier or a thin cross-fiber binder. Because there is no interlacement, there is no crimp. That absence of crimp is the defining mechanical advantage: UD delivers the highest tensile stiffness and strength along the fiber axis of any carbon fiber fabric format.
When UD is the right choice:
- Spar caps, flanges, and beam structures where the primary load path is well-defined
- Stiffening layers in a laminate schedule where directional stiffness is needed without adding unnecessary weight in the off-axis direction
- Hybrid laminates where UD plies carry primary loads and woven plies handle shear and secondary loads
Stacking guidance:
- A common orientation sequence for balanced laminates is 0°/±45°/90°, which distributes stiffness across multiple load directions
- Alternating UD plies with woven plies (e.g., a 2×2 twill skin over UD structural plies) combines a cosmetic surface with directional structural performance
- Avoid stacking multiple UD plies in the same orientation without balancing cross-plies; unbalanced laminates warp during cure
Cutting and handling: UD frays along the fiber direction with minimal provocation. Use stitch-bonded UD (where a light cross-stitch holds the fibers together) for easier handling, or apply a strip of masking tape along the cut line before cutting and peel it away after placement. Prepreg UD is considerably more manageable than dry UD for precision layups.
What specialty weaves exist beyond the standard families?
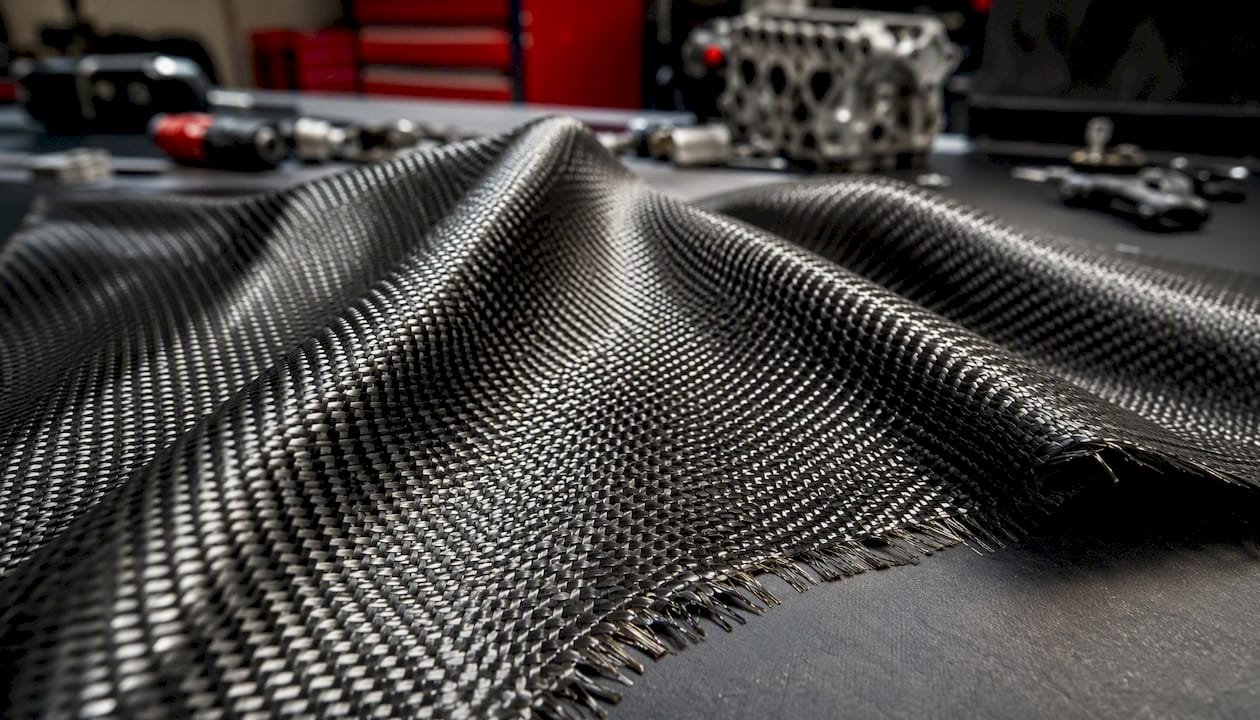
Basket weave is a variant of plain weave where two or more bundles travel together as a unit, producing a larger-scale grid pattern. It offers slightly better drape than single-bundle plain weave and is used in some decorative and semi-structural applications.
Braided structures wrap fibers helically around a mandrel or core, producing tubular reinforcements used in roll hoops, drive shafts, and flexible reinforcement sleeves. Braiding angle controls the balance between axial and hoop stiffness. These are not flat fabrics and require different tooling.
3D woven and stitched fabrics introduce fibers in the through-thickness direction, dramatically improving resistance to delamination. They are used in thick structural components, crash structures, and parts subjected to out-of-plane loading. Cost and tooling complexity are substantially higher than for 2D woven fabrics.
Decorative and artistic weaves — sometimes marketed under names like Rook, Labyrinth, or grandmaster patterns — rearrange the interlacement geometry to create geometric visual effects. These are aesthetic choices, not structural ones. Mechanical properties follow the same rules as the underlying weave geometry; the pattern does not add strength. Treat them as cosmetic options and specify a structural backing ply accordingly.
Side-by-side comparison of the main carbon fiber weave families
| Weave | Drapability | Fabric stability | Surface finish | Directional stiffness | Layup ease | Typical applications | Relative cost |
|---|---|---|---|---|---|---|---|
| Plain (tabby) | Low | High | Moderate (textured) | Balanced, moderate crimp | Easy | Flat panels, housings, beginner layups | Low |
| 2×2 Twill | Moderate | Good | Excellent (diagonal pattern) | Balanced, low-moderate crimp | Easy to moderate | Automotive skins, visible trim, general structural | Low-moderate |
| 4×4 Twill | Moderate-high | Moderate | Bold diagonal | Balanced, moderate crimp | Moderate | Large panels, decorative structural | Moderate |
| 4HS / 8HS Satin | High | Low | Very smooth | Balanced, very low crimp | Demanding | Complex curves, fairings, tight bodywork | Moderate-high |
| Spread-tow | Moderate | Moderate | Ultra-smooth, minimal grain | High stiffness-per-thickness | Demanding | Aero surfaces, cosmetic exterior, thin laminates | High |
| UD | N/A (non-woven) | High (with carrier) | Structural only | Maximum along fiber axis | Moderate (prepreg) | Spar caps, flanges, load-critical structures | Moderate-high |
For a flat structural panel where stability and predictable resin uptake matter most, plain weave is the efficient choice. For a visible skin on a moderately curved automotive part, 2×2 twill 3K at 200–240 gsm is the industry-standard answer. Where the geometry demands tight compound curves and a near-finished surface, 8HS satin with vacuum-bagging is the path forward.
How do you choose the right weave for your specific project?
Start with the dominant constraint, not the aesthetics. The weave that photographs best is not always the weave that builds best.
- Define the load path. If the part carries a known directional load (bending, axial tension), UD plies belong in the schedule. If loading is multi-directional or unknown, a balanced woven fabric is safer.
- Assess the geometry. Flat or single-curvature? Plain or twill handles it cleanly. Compound curves or tight radii? Move to 4HS or 8HS satin. Deep draws with no bridging tolerance? Satin or spread-tow only.
- Decide on the visible face. If the part will be clear-coated and seen, choose 2×2 twill 3K for the outer ply. If ultra-smooth finish is the goal, spread-tow or 8HS satin with a fill coat.
- Select tow count and areal weight. Fine cosmetic work: 3K at 200–240 gsm. Structural backing plies: 6K or 12K at 300–600 gsm. Match ply count to target laminate thickness.
- Run a proof panel before committing to a full mold. Cut a 300 × 300 mm test piece, bag it, and cure it. Check for bridging on any radius, resin pooling in corners, and edge fraying. Composite reinforcement suppliers consistently recommend this step as the cheapest insurance against expensive rework.
Red flags to watch for: bridging on double-curvature sections (switch to higher-drape weave), resin pooling in satin layups (reduce resin content or switch to prepreg), fraying on cut edges (use tabbing tape or stitch-bonded fabric), and fiber misalignment in UD plies (use a carrier or prepreg format).
Manufacturing considerations: tow count, prepreg, crimp, and common defects
Weave choice shapes every downstream manufacturing decision, from resin uptake to cure cycle behavior. That connection is worth stating plainly before specifying a fabric.
Tow count and surface texture: 1K and 3K tows produce a fine, tight surface grain suited to cosmetic parts. 6K and 12K tows are coarser, faster to lay up, and more cost-effective for large structural laminates where surface texture will be painted or hidden.
Prepreg vs. dry fabric: Prepreg (pre-impregnated) fabric carries a precisely metered resin system and is the preferred format for satin and spread-tow fabrics where resin content control is critical. Dry fabric with wet layup or infusion is more forgiving for plain and twill weaves on simple geometries. For wet vs. dry carbon fiber processes, the choice affects not just finish quality but also the repeatability of the laminate across a production run.
Common defects and remediation:
- Bridging: fabric spans a concave radius instead of conforming. Fix: switch to a higher-drape weave, apply vacuum in stages, or add relief cuts in non-structural areas.
- Resin pooling: excess resin collects in corners or low points. Fix: reduce resin ratio, use prepreg, or add a bleeder layer.
- Wrinkling: fabric buckles during cure. Fix: apply vacuum progressively, use a caul plate, or switch to a more stable weave.
- Fiber misalignment: UD or spread-tow fibers shift during placement. Fix: use prepreg or stitch-bonded carrier; apply light tack spray to the mold surface.
- Edge fraying: satin and spread-tow fabrics unravel at cut edges. Fix: seal cut edges with masking tape before cutting; remove tape after placement.
For a typical automotive exterior skin panel, a practical starting schedule is two plies of 2×2 twill 3K at 200 gsm for the visible face, followed by one or two plies of 2×2 twill or plain weave at 300 gsm for structural backing, with a compatible epoxy system cured at 80–120°C depending on the resin specification.
Asmsportstech: applying weave selection to automotive body panels
For OEM+ body panels that must hold tight tolerances, survive road use, and look exceptional under clear coat, weave selection is not a stylistic afterthought. At Asmsportstech, the approach for visible exterior components centers on 2×2 twill 3K pre-preg for the cosmetic skin, paired with structural backing plies in twill or UD where the geometry demands it.
Part-by-part guidance:
- Hood and roof panels: 2×2 twill 3K outer ply, 2×2 twill or plain weave backing. Flat to mildly curved geometry suits twill well; UD stiffening strips along the centerline add rigidity without weight.
- Front splitters and diffusers: UD plies in the span direction carry bending loads; twill face plies deliver the finish. Edge reinforcement with additional UD or a woven bias ply prevents delamination at high-stress corners.
- Mirror caps and small trim pieces: 2×2 twill 3K pre-preg throughout; the tight geometry is manageable with twill, and the fine tow count reads proportionally on small surfaces.
- Wide-body quarter panels and complex fender flares: 4HS or 8HS satin for sections with compound curvature; twill for flatter areas. Hybrid layups within a single part are standard practice.
Dos and don’ts:
- Do use pre-preg for repeatable, production-quality results on visible panels
- Do vacuum-bag every satin ply; hand pressure alone will not hold complex geometry through cure
- Do seal all cut edges before placement to prevent fraying contaminating the laminate
- Don’t use 8HS satin for flat panels where plain or twill will perform equally well at lower cost and handling risk
- Don’t skip the proof panel step before a full mold run, regardless of experience level
Pro Tip: When laying up a satin ply over a tight convex radius, apply the vacuum bag in two stages: pull to 0.3 bar first and let the fabric conform for five minutes, then bring to full vacuum. This staged approach prevents the fabric from locking in a wrinkle before it has time to settle into the mold geometry.
For platform-specific guidance on carbon fiber body kits for road cars and on how weave selection integrates with fitment engineering, Asmsportstech’s program documentation covers the full specification chain from fabric choice through to final clear coat.
Notation and glossary: decoding spec sheets and fabric listings
2×2 twill — each fiber bundle passes over two and under two crossing bundles; the offset row creates the diagonal pattern.
4HS (4-harness satin) — each bundle floats over three crossing bundles before one interlacement; 8HS floats over seven.
1K / 3K / 6K / 12K — thousands of individual carbon filaments per tow bundle. Lower numbers produce finer surface texture; higher numbers reduce cost per unit area.
gsm (g/m²) — grams per square meter; the standard areal weight unit in composite specifications.
oz/yd² — ounces per square yard; the US equivalent. Conversion: 1 oz/yd² ≈ 33.9 gsm. A common 200–280 gsm fabric equals approximately 5.9–8.2 oz/yd².
Crimp — the waviness introduced into a fiber bundle at each interlacement point; reduces effective tensile stiffness along the fiber axis.
Float — the length of fiber running uninterrupted over multiple crossing bundles; longer floats mean less crimp and better drape.
Warp — fiber bundles running lengthwise through the loom (0° direction in the finished fabric).
Weft — fiber bundles running perpendicular to the warp (90° direction).
UD (unidirectional) — non-woven fabric with nearly all fibers aligned in one direction; no interlacement, no crimp.
Prepreg — fabric pre-impregnated with a precisely metered resin system; requires refrigerated storage and a controlled cure cycle.
The practical reality behind carbon fiber weave marketing
Marketing photography does most of the heavy lifting in carbon fiber sales, and it routinely overstates what weave choice alone can deliver. The mechanical performance of a finished part depends on laminate schedule, fiber volume fraction, cure quality, and resin system — not on which weave pattern sits on the visible face.
A few myths worth correcting directly:
- “Twill is always stronger than plain” — false. At equivalent fiber volume fraction and laminate thickness, the difference in tensile strength between plain and twill is modest. The real gap is in drape and handling, not raw strength. Weave geometry affects properties like abrasion resistance and crease recovery, but neither weave is categorically stronger in a well-designed laminate.
- “Satin weaves produce a stronger part” — also false. Satin’s low crimp does improve fiber alignment and can yield slightly higher in-plane stiffness, but the handling risk and potential for fiber misalignment during layup can easily erase that advantage.
- “More expensive fabric means better performance” — not automatically. Spread-tow and 8HS satin cost more because they are harder to manufacture and handle, not because they are universally superior. For a flat panel, plain weave at a fraction of the cost performs comparably.
The honest calculus: spend on higher-drape or spread-tow fabrics when the geometry genuinely demands them. For flat and mildly curved parts, understanding what carbon fiber actually is and specifying a well-executed 2×2 twill layup will outperform an expensive satin fabric handled carelessly. Cost and complexity are only justified when the part geometry or finish requirement cannot be met any other way. And always, always run a proof panel to check for common carbon fiber misconceptions before committing to production.
Sources
- Basic weaves — Britannica
- Weaving styles and properties – Eurocarbon B.V.
- How To Choose The Right Carbon Fiber Fabric: Weave, Weight & Tow Guide – BulkComposites
- Carbon Fiber Fabric: Industrial Buyer Guide to Types, Specifications and Applications – Impact Materials
- Analysis the Influenced of Plain and Twill Structures on Woven Fabric Properties — SCIRP (Journal of Textile Science and Technology)